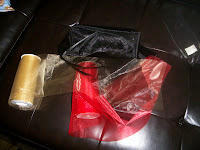
What you will need:
- Your choice of 6" Organza Rolls (25 yards)
- Black Cord
- Sewing Machine
- Thread
- Curtain Tassels
I started with 3 - 6" 25 yard Organza rolls, these can be found online more commonly in wedding supplies or at your local Joanns or Michaels. You can select as many colors as you like, remember the more strips you use the "fluffier" it will be.
Next step is to align your layers together (again I did mine with just 3 layers, if you are making a child sized boa I would suggest only 3 layers so that its not too much for a child, however if you plan on extending to a full size 6-9ft boa I highly advise 6). Place the 3 layers into your machine using the foot to hold your fabric.
Proceed with a zigzag loose stitch as you move along start bunching the fabric by grabbing your starter thread and carefully feeding the fabric down, I found the zigzag stitch to be a far easier to bunch than the straight stitch. Continue sewing strips and bunching until you reach your ending point. To create a 2.5' ft boa I stitched approximately half the roll (give or take) as you stitch and bunch you can get a good idea of your total final length.
After you've completed your stitches finish bunching the your fabric, it will appear as a flat strip with a natural twirl to it. Begin separating and "fluffing" the strips for a fuller look.
After you complete your "fluffing" your boa, take the black cord and run it directly along your original stitch line, this will help keep the twirl and the fluff of the boa, on zigzag once again (I found it easier not to have my foot down as the fabric is bunched) and continue to cord the entire stretch of your boa.
Once you have completed adding the cord to your boa, re-fluff any pieces that may have flatten during the final stitch, add tassels to the end, and you end up with a fabric boa!
I do advise do not try this around any feline friends who may take the hanging threads and rolls of organza as play toys even those without claws can cause much destruction during this process.


